Reconstructing Stonehenge
Gerald Hawkins guessed that if Stonehenge marked one alignment with a celestial object, the Sun, it might mark others as well, like the sunrise and sunset we just recorded, or the risings or settings of stars or planets. To test that suspicion, his hypothesis, Hawkins first had to “reconstruct” Stonehenge, at least on paper, to see what alignment markers might have been present when Stonehenge was in use.
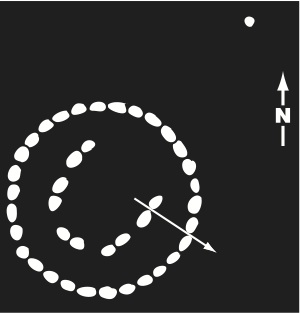
VISUAL 6 (still): Diagram of the Larger Inner Stones (Fade on the diagram of Stonehenge).
This map of Stonehenge, as seen from above, shows what Gerald Hawkins imagined Stonehenge would have looked like when it was finished, about 1500 BC. He has drawn in missing stones and positioned fallen stones back upright. Stonehenge today is in far from perfect condition. In the 18th century, you could visit Stonehenge, rent a sledgehammer, and take home a piece for a souvenir.
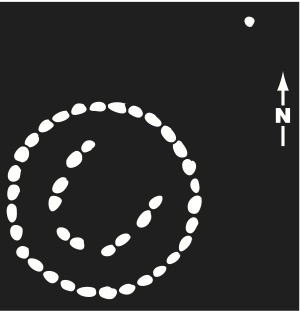
Standing in the center of the monument [point out], Hawkins would not have been able to see much horizon at all—there seemed to be no especially significant views from the center. Even the famous Heel Stone sunrise alignment did not go through the exact center of the monument. It is important that Hawkins then asked another question, because if he hadn’t, he might have given up, thinking that there were no other astronomical directions marked by Stonehenge.
What additional questions might you ask about possible alignments?
As you guessed (or did not guess), Hawkins asked himself if there might be significant views of the horizon if you stood at places besides the center.
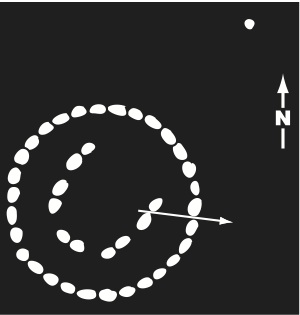
VISUAL 7 (still): Diagram Showing a Possible Alignment (Cross-fade an image of a first guess alignment).
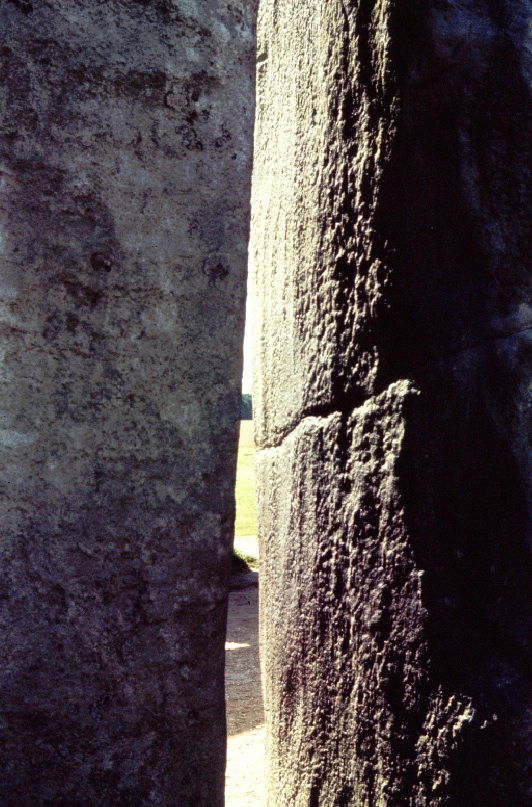
Standing in front of these two stones you would be looking through a narrow gap between two of the giant stones. [Point out on diagram.]
VISUAL 8 (still): Photograph of That View, Which is Mostly Obscured (Fade on a view through the trilithon of the above view, completely blocked).
Would you say that this is a good view of the horizon?
[Accept answers without saying “right” or “wrong,” suggesting that we compare it with the other possible view.]

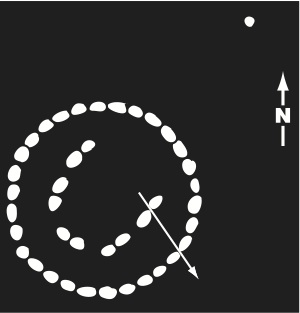
VISUAL 9 (still): Diagram of a Second Possible Alignment Through the Same Trilithon (Cross-fade an image of a second guess alignment).
Now let’s try standing in the same spot, but looking in a slightly different direction. [Point out arrow. ]
We would then see this:
VISUAL 10 (still): Photograph of That View, Which is Also Obscured (Fade on a view through the trilithon of the above view, partially blocked.)
Well, what do you think of this view?
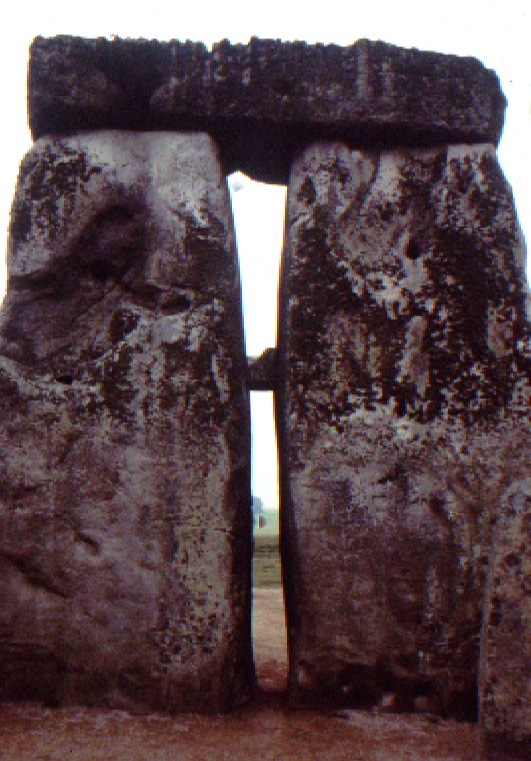
VISUAL 11: Diagram of a Third Possible Alignment Through the Same Trilithon (Cross-fade an image of a second guess alignment.)
Let’s try looking through the trilithon and these two stones this time. [Point out.] Here is what you can see now.
VISUAL 12 (still): Photograph of That View, Which is Clear to the Horizon (Fade on a view through the trilithon of the above view, with a clear view to the horizon.)
Pause for audience comments about how this view compares with the last two views.
The builders of Stonehenge were very careful to place their stones in just the right spots, and then to pound and scrape them. And one result was that each of the trilithons provides one or two narrow but good views of the horizon.
VISUAL 13 (still): Photograph of Another Trilithon and its Alignment with Other Stones (Cross-fade an image of repeated alignments and another clear view through a trilithon with all the previous images.)
Here is the view through another trilithon. Look how carefully the narrow gaps restrict your view to just one direction on the horizon. Hawkins argued that these alignments were probably not accidental, because it took a lot of work to pound lumpy boulders into the straight edge rectangles which create these views.
The next surprise for Hawkins was that the views he had found were in directions repeated by other, outlying stones at Stonehenge.

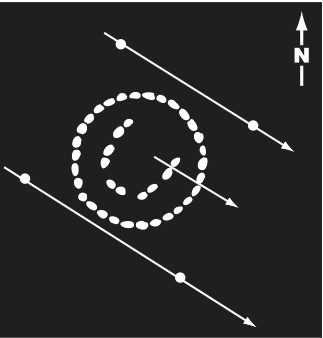
VISUAL 14 (still): Diagram Showing Previous Trilithon Alignment Repeated by Other Features at Stonehenge
This diagram shows the positions of a few of the smaller stones at Stonehenge which archaeologists had previously thought to be placed randomly, or to be fragments of now-destroyed other rings of stones. Hawkins found that sighting along these features repeated some of the important directions that he found established by the trilithons.
Within a variation of about 1 degree, these three lines of sight are parallel. In the same manner, Hawkins found a total of ten alignments he thought might be important. He knew that one of those marked the position where the Sun rises on the longest day of the year.
What other astronomical objects might the alignments at Stonehenge keep track of by pointing to their rising or setting positions?
[Note responses and repeat the list at the end.]
To answer this important question, Hawkins turned to a computer. He fed into it a diagram of Stonehenge, the one you have seen, and information about the positions of the stars, the Sun, Moon, and the planets as they appeared to the builders of Stonehenge. He then asked the computer: “Did something important happen (like the rising or setting of some celestial body) at these ten points on the horizon?”