Filters
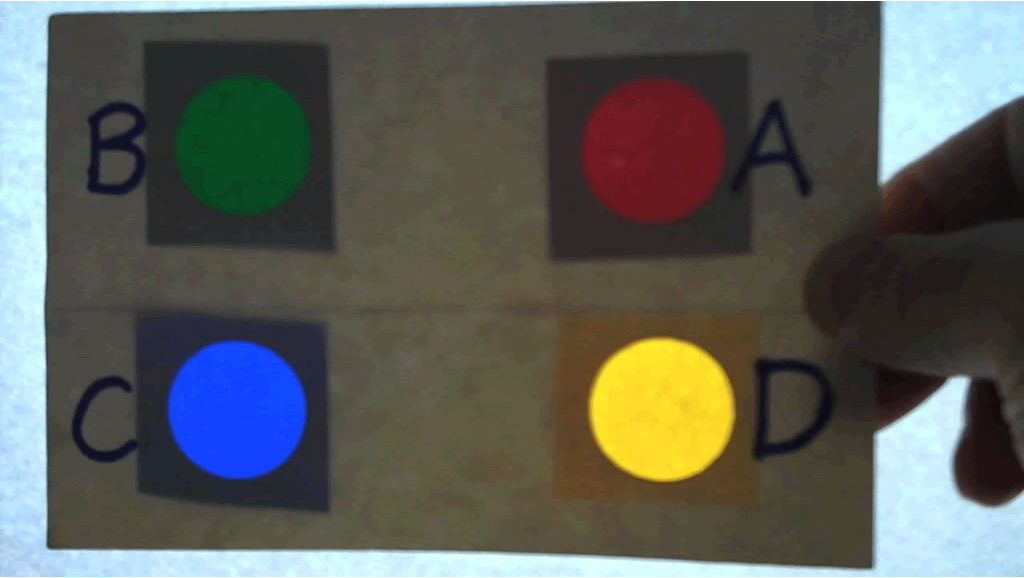
We just looked at light reflected from objects like cloth. We will now look at how light goes through certain kinds of windows. I am handing out some devices that we call “color analyzers.” When you get yours, look for four windows—each of them labelled with the letters A, B, C, and D.
VISUAL (alternative movie): Filters
If your presentation is not using physical color analyzers with your audience, show the “filters” movie. Fade on and immediately play a short video clip of the filters activity. Pause the movie on each color section to ask the questions. May be used instead of a live demonstration.

In the Filters movie, the color analyzer has 4 filters (red, green, blue, and yellow) instead of 3—and there is no diffraction grating. The “D” opening has a yellow filter in the movie and images, but has a diffraction grating (clear) in the physical color analyzers that we used in development of this activity.
Make sure only the red light is on.
Hand out the color analyzers, keeping one for yourself.
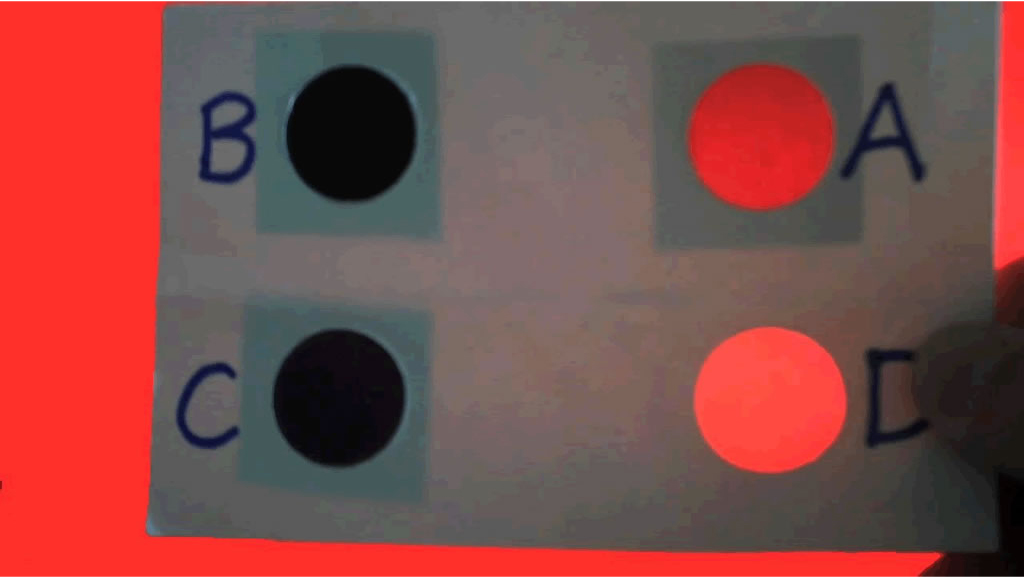
Filters with red light
I’d like you to hold your color analyzer up and look at the ceiling through the windows.
[Demonstrate with yours.]
Which window looks brightest? [D.]
Which is second brightest? [A.]
Notice windows B and C look black or very dark.
Each window has a different color of plastic in it.
Can you tell what color each window is?
What color is window A? . . . B? . . . C?
[Accept guesses but do not indicate if any of the answers are correct at this time.]
If using the movie (and no color analyzers handed out), explain that as we go through different colors of light we will display images of color analyzers against a red, green, blue, and white background. You can display the images positioned 45° from the horizon, and spaced 90° from each other. Individual images may be toggled on/off. This may be used either to summarize live use of filters, or to summarize the video (if used).
VISUAL 1a: Analyzer Red Light
Fade on still image of color analyzer against a red background, positioned 45° from the horizon.
Let’s go to a different star, say a green star.
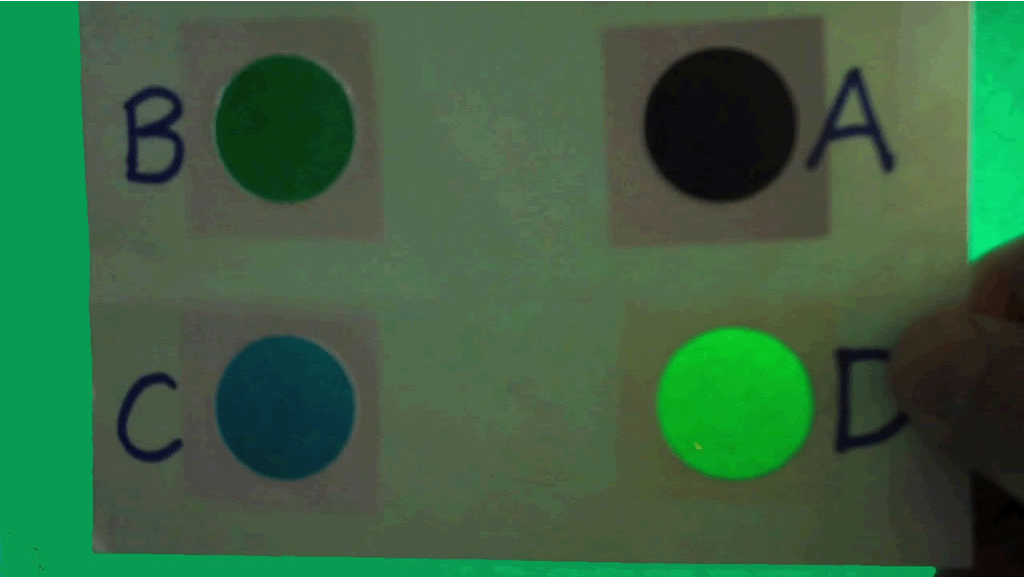
Filters with green light
DIGITAL EFFECT: Green Light
Switch off red, switch on green. If using the movie, keep a still image of the color analyzer in red light on.
Now, which window looks brightest? [D.]
And the second brightest?
[Window B, but window C is also bright.]
Also, notice that window A looks dark.
Do you want to revise your guess as to what colors the windows are?
[Again, accept guesses but do not indicate if any of the answers are correct at this time.]
VISUAL 1b: Analyzer Green Light
Fade on still image of color analyzer against a green background, positioned 45° from the horizon.
Let’s go to a blue star.
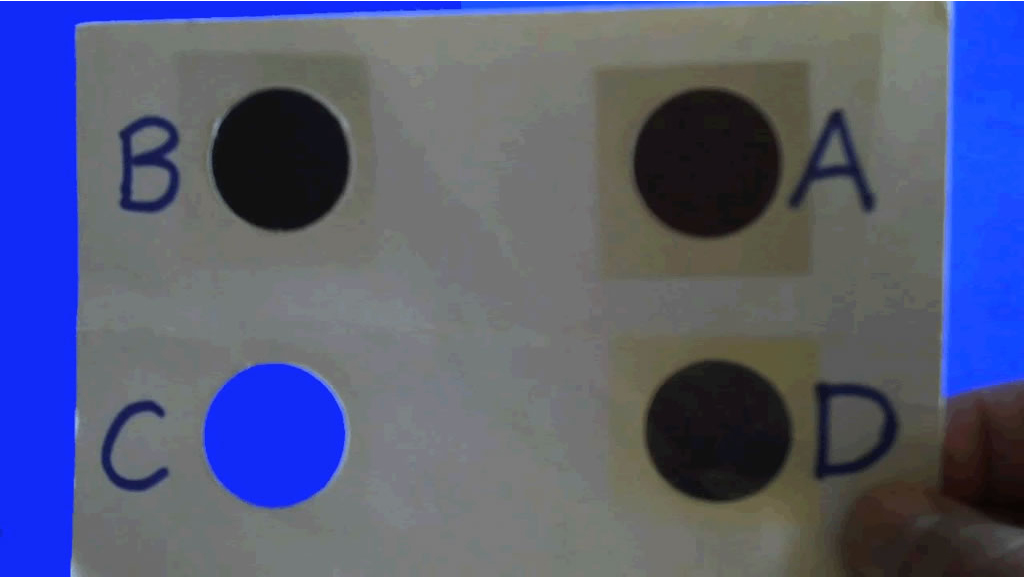
Filters with blue light
DIGITAL EFFECT: Blue Light
Switch off green, turn blue on. If using movie, keep still image of color analyzer in green in separate place on dome.
Again, which window looks brightest? [D.]
And the second brightest?
[Window C, and now window B is bright but dimmer.]
Notice again that window A looks dark.
Now, do you think you can guess what colors windows A, B, C and D are?
VISUAL 1c: Analyzer Blue Light
Fade on still image of color analyzer against a blue background, positioned 45° from the horizon.
Optional—A deeper analysis of filters for older groups:
Rarely do we ever see absolutely pure colors of light.
There is no such thing as a “perfect” filter; a perfect filter lets through only one color of light. Our green filter lets through a little bit of blue light, in addition to the green light. Let’s see which of the filters in our analyzers is nearest to “perfect.”

Do the red or green filters let through any of the blue light? [The green filter does. The red does not.]

DIGITAL EFFECT: Green Light [Turn off blue; turn on green.]

Do the red or the blue filters let through any of the green light? [The blue filter does. The red is still black.]

DIGITAL EFFECT: Red Light [Turn off green; turn on red.]

Do the green or the blue filters let through any of the red light? [Not much.]

Which is the best filter? [Red—lets through only red light.]

Which filter is worst? [Blue—lets through a lot of green.]
DIGITAL EFFECT: Red Light
Turn off blue; turn on red.
If using movie, refer to red and green still images on the dome. You can use the blue still image, but the movie goes directly to the view with white light after blue, so make sure to pause the movie for discussion about what the filter colors are.
What color do you think window A is? [Red.]
And window B? [Green.]
DIGITAL EFFECT: Green Light. Turn off red; turn on green.
And window C? [Blue.]
DIGITAL EFFECT: Blue Light. Turn off red; turn on blue.
And window D? [Clear, transparent.]
DIGITAL EFFECT: White Light
Turn on red, green and blue.
VISUAL 1d: Analyzer White Light.
Fade on still image of color analyzer against a white background, positioned 45° from the horizon.
The plastic in the windows we have been looking through are called filters. Filters can also be made of other materials such as glass.
A red filter lets red light through and absorbs light of other colors. A blue filter lets blue light through and absorbs red and all other colors. A green filter lets through only green light, etc. In summary, a filter lets through light of one color (its own) but absorbs the rest.
The rules for filters are very similar to the rules for the reflected light from other objects; filters let light of one color pass through to our eyes while colored objects reflect light of their color to our eyes.
Using Filters to Create a Color Image of Mars
Astronomers, engineers and scientists use filters in various ways.
For instance, here’s a picture of Mars taken by the Viking spacecraft.
VISUAL 2a (still): Mars with Red Filter
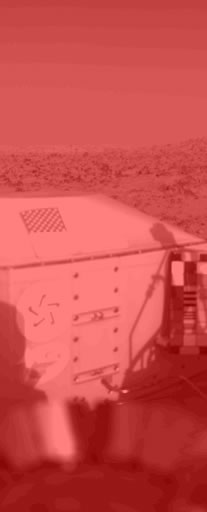
This picture was taken with a black and white camera and a filter.
What color filter was it? [Red.]
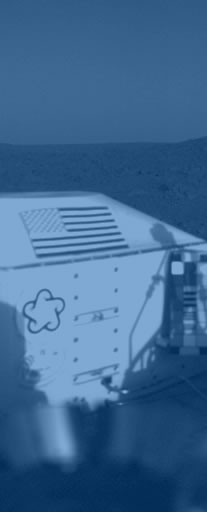
Then, the Viking took a picture of the same scene with a blue filter.
DIGITAL EFFECT: Mars Blue Filter
“Push” the red Mars image along the horizon to a new location, and make a blue-filtered image appear at the original location of the red image. Note: The exact positions along the horizon may be adjusted, but the timing of the “push” will also have to be adjusted.
VISUAL 2b (still): Mars with Blue Filter
The camera viewed the same scene also with an amber filter.
The Viking spacecraft sent all the information to Earth where NASA scientists used computers to put the pictures together to get a full color picture of Mars, taken with a black and white camera!
VISUAL 2c (still): Color Picture of Mars
“Push” the blue Mars image over to the new location of the red image, and then “composite” the two together to form a color image. Note: Again, the exact positions along the horizon may be adjusted as the user sees fit for their own theater, but the timing of the “push” will also have to be adjusted.
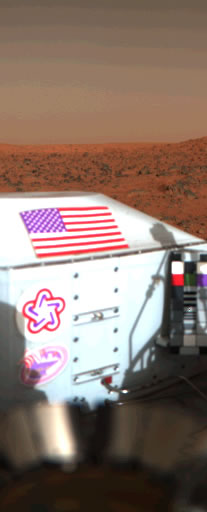
A color TV set works in a similar way. It receives pictures of only red, green and blue and your set puts it together. The U.S. flag you see on the spaceship was used to adjust the colors to the right mix, by comparing it with an identical flag on Earth.
Let me show you how astronomers can use filters to learn more about the things they see in space. Sometimes they can see much more contrast, and finer detail, by selecting only one color
Fade off the Mars image.
Viewing Jupiter Through Filters
VISUAL 3a (still): Jupiter through Blue Filter

Do you recognize this planet? [Jupiter.]
It’s easy to tell Jupiter with its Great Red Spot. But wait! Why is the red spot dark? This picture was taken with a filter.
Can you guess what color filter? [???]
This image was taken through blue filter. All areas of Jupiter reflecting red light look darker in this image.
Visuals 3a and 3b of Jupiter through red and can be replaced by having a color image of Jupiter and having students look at the image through their color analyzers.
VISUAL 3b (still): Jupiter through Red Filter
This image shows a black-and-white red-filtered image of Jupiter. Note the brighter shading of the Great Red Spot. The red light passes through the red filter easily.
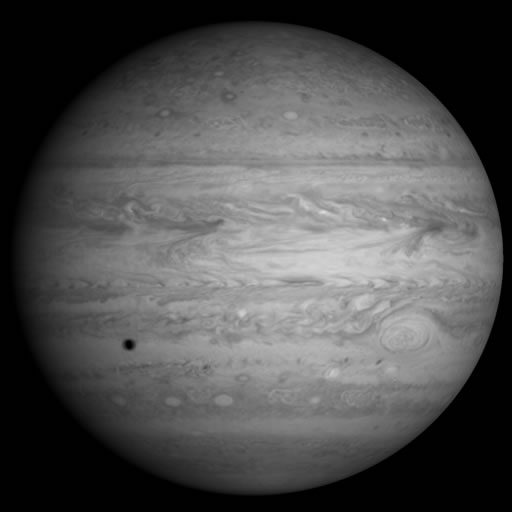
A blue filter makes certain features stand out, easier to see while the red filter makes different features easier to see.
Fade off the Jupiter images.
So, different filters can make different details stand out.
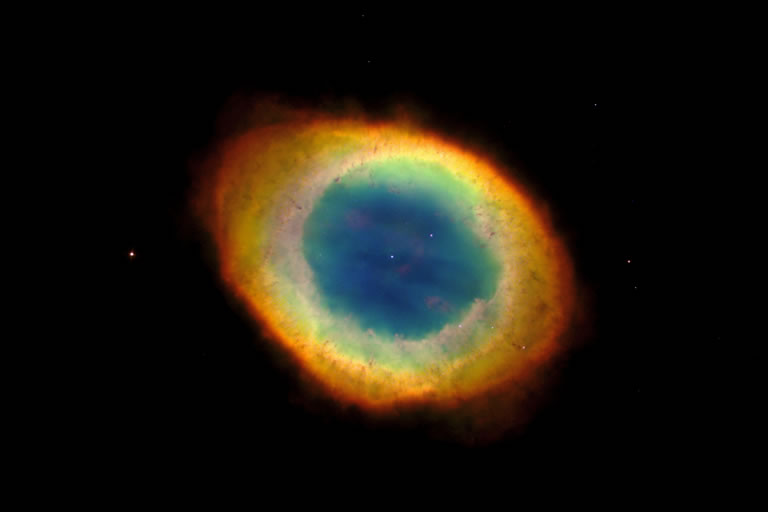
Viewing The Ring Nebula Through Filters
Here’s a series of pictures of The Ring Nebula in Lyra, a gigantic cloud of dust and gas in space. Ring shaped nebulae (planetary nebulae) are the remains of very old stars. These pictures were taken with different filters, each of them showing different details.
VISUAL 4a (still): Ring Nebula through Red Filter
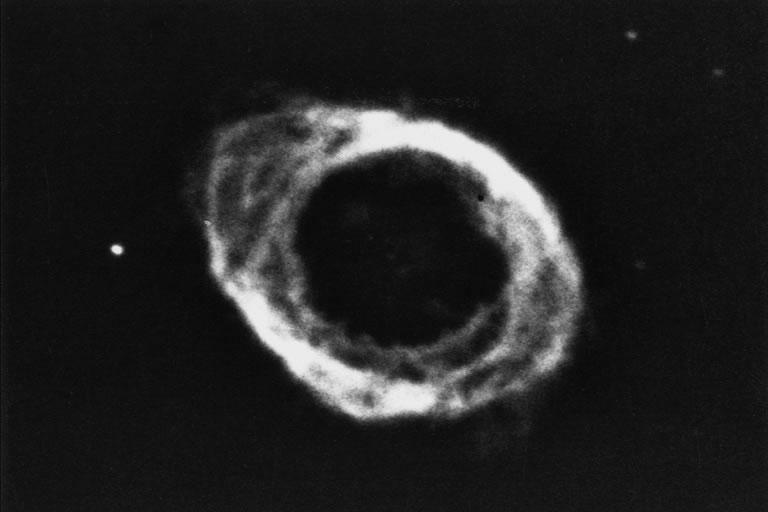
Show the Ring Nebula in a sequence of still images, starting with a red-filtered image.
VISUAL 4b (still): Ring Nebula through Yellow Filter

Show a yellow-filtered image of the Ring Nebula, 180° from the red-filtered image.
VISUAL 4c (still): Ring Nebula through Green Filter
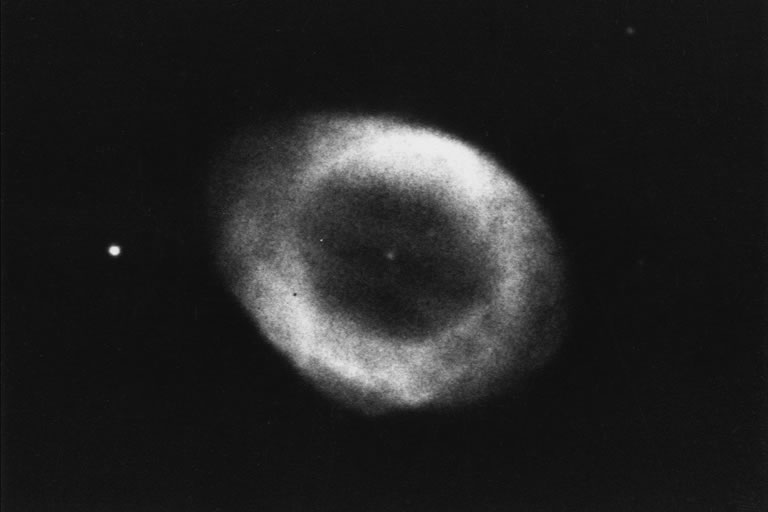
Show a green-filtered image of the Ring Nebula, 90° from the red- and yellow-filtered images.
VISUAL 4d (still): Ring Nebula through Blue Filter
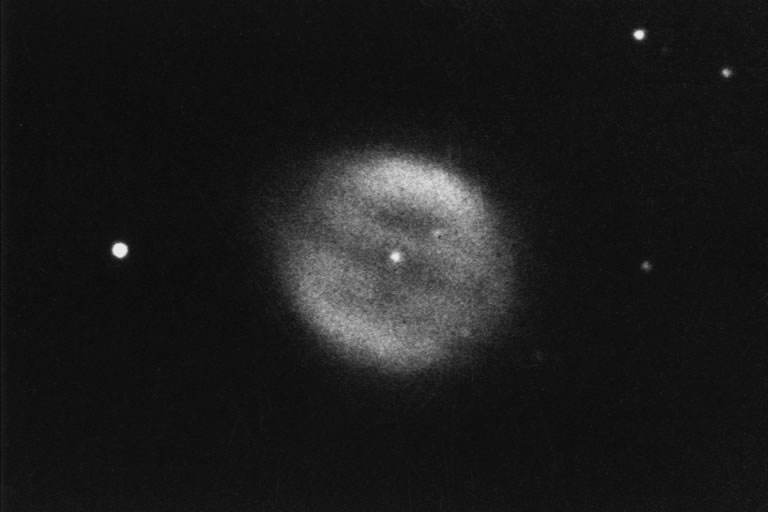
Show a blue-filtered image of the Ring Nebula, 180° from the green-filtered image.
Now the composite picture…
DIGITAL EFFECT: Ring Nebula Color. Move all four color-filtered images to a single location, and “composite” them into a single color image.
VISUAL 4e (still): Composite Color Picture
…the Ring Nebula in full color.
Fade off the Ring Nebula image.
Optional
Show the sequence of images 4a through e again, saying the filter colors, so that the students have another chance to see the successive inner regions of the nebula revealed.
VISUAL 5: Multiple Sun Views—fulldome image/movies. The Multiple Sun Views displays 10 simultaneous views of the Sun, each using a different wavelength, but all were taken at the exact same time on the Sun.
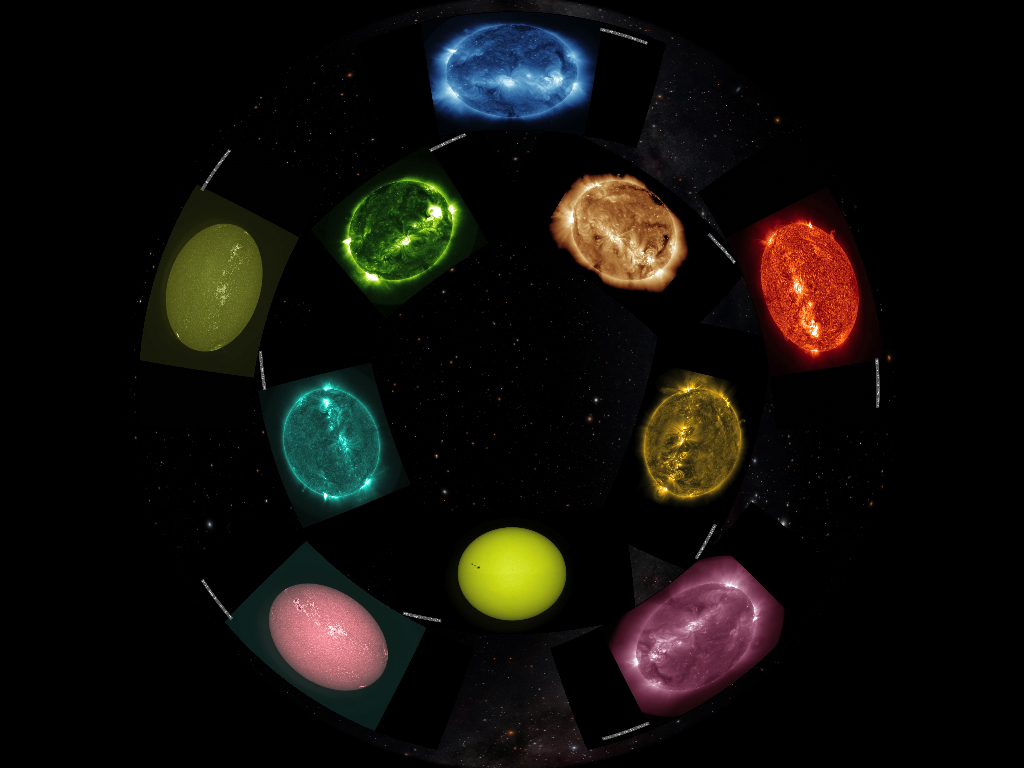
Here’s another example of using filters looking at the Sun. Each individual video is a view of the Sun using a different filter, focusing on a particular wavelength of light. All ten of these video clips cover the same 17-hour time span. Notice how different the Sun looks in each view—depending on which filter you use, some features are enhanced, while others may be invisible. Astronomers use filters so they can get a more complete picture of objects or events, and each filter view adds one more piece to the whole.
Fade off Multiple Sun Views